Creating a dimensional feature wall can change a quiet room into a strong visual statement. This guide explains how to create 3D wall effects with China Top Panels, using practical planning and careful installation. These panels can help imitate stone, wood, waves, fluting, or geometric surfaces without rebuilding the entire wall. The final appearance depends on panel quality, lighting, surface preparation, and accurate alignment.
Start by studying the room’s natural light and existing colors. A matte textured panel may look calm beside warm lighting, while a deep geometric pattern can create sharper shadows. Measure the wall carefully, including doors, sockets, corners, and ventilation areas. Small errors become visible when repeated panels meet.
Preparation matters more than many beginners expect. The wall should be clean, dry, flat, and structurally sound. Use a level, measuring tape, cutting tool, adhesive, and suitable safety equipment. Check the manufacturer’s installation instructions before applying any material. Panel density, moisture resistance, fixing methods, and expansion requirements can vary between products.
Dry-fit the panels first. This simple step reveals awkward joints and prevents unnecessary cutting. Begin from a clear reference line, then work steadily across the wall. Keep patterned surfaces aligned, especially around eye-level areas. Do not hide every imperfection. A slightly uneven edge may show where planning needs improvement, but it also encourages a more honest installation process. Review the wall from different distances before final fixing. Good results come from patience, realistic material choices, and attention to detail rather than decoration alone.
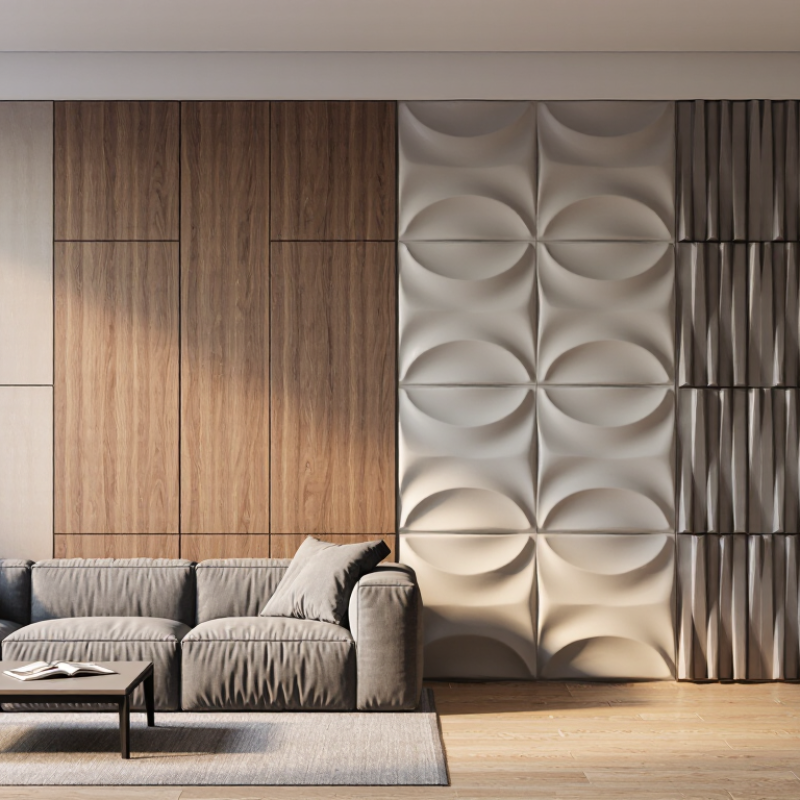
Three-dimensional wall effects use depth, shadow, and repetition to change a room’s character. China top panels can support this design when their surface quality and measurements are consistent. Common options include carved wood, PVC, mineral composite, and moisture-resistant fiber panels. Each material creates a different touch and visual rhythm.
Hold it near a window and under warm lighting. Small grooves may disappear in dim rooms. Measure the panel thickness, edge alignment, and pattern repeat.
I once chose a dramatic wave texture that looked impressive online. In person, uneven joints made the wall feel noisy. That mistake taught me to inspect several samples together.
Check fire behavior, formaldehyde or VOC information, moisture resistance, and cleaning limits. Do not accept vague certificates. Verify whether reports match the exact panel specification and production batch.
Top panels also need protective packaging, because crushed corners can ruin a precise 3D layout. Leave expansion space where the installation environment requires it.
Adhesive choice matters too, especially on painted, damp, or uneven surfaces. A professional installer should confirm the wall condition before fixing the panels. Even excellent panels cannot correct a weak substrate.
Depth, shadows, repeated patterns, and surface texture create the visual effect. Deep grooves can look dramatic. In small rooms, they may feel too harsh.
Moisture-resistant panels suit kitchens and covered balconies. Lightweight PVC or composite panels can reduce wall load. Textured finishes with softer shadows often suit bedrooms.
Catalog images can hide uneven joints and exaggerated textures. Hold samples near a window and under warm lighting. Touch the surface. Small grooves may disappear in dim rooms.
Check thickness, dimensions, weight, edge alignment, coating, cleaning limits, and pattern repetition. Ask for material data and safety test reports. Vague documents deserve caution.
Inspect the substrate for bumps, moisture, loose paint, and uneven areas. A suitable backing system may be necessary. Excellent panels cannot correct a weak wall.
Confirm adhesive compatibility with painted, damp, or uneven surfaces. Leave expansion space when required. Protect corners during shipping and keep spare panels for repairs.
Inspect joints under side lighting, especially near sunset. Use compatible filler and sand lightly with fine-grit paper. Apply two thin coats with gentle roller pressure.
Use a soft microfiber cloth and diluted, non-abrasive cleaner. Avoid soaking joints and corners. Check for lifted edges, hairline cracks, and dark marks every few months.
Warm lighting or slim wall washers can emphasize raised textures and shadows. Test the lighting first. Natural light may reveal minor variations later.
I once selected a dramatic wave pattern from an online image. Uneven joints made the wall feel noisy. Perfect uniformity is difficult. Inspect several samples together.
Learning how to create 3D wall effects with China top panels begins with understanding how panel textures, patterns, and light interact to produce depth. Choose panels according to the room’s style, wall dimensions, moisture conditions, and desired visual impact. Before installation, clean, repair, and level the wall surface, then measure carefully and plan the panel layout to balance the pattern and reduce unnecessary cutting.
During installation, follow the planned arrangement, use suitable fixing materials, and check alignment continuously so the raised design remains consistent. After all panels are secured, seal joints, smooth visible edges, and apply the recommended finishing treatment if needed. Regular dusting and gentle cleaning will help preserve the surface, while suitable lighting, contrasting colors, or decorative elements can further emphasize the three-dimensional effect. With careful preparation, accurate installation, and routine maintenance, these panels can transform an ordinary wall into a durable and visually engaging feature.

 Rock Stone